| Japan v Australia – 
              Senior Bowl Round 5  After two days play the Australian Senior team was lying third, 
              just 2 VPs behind the leaders. Round Five saw them face Japan, also 
              well in touch in seventh position. 
             
              
                | Board 17. Dealer North. None 
                    Vul. |  
|  | ª 9 8 7 6 3 © J 5
 ¨ Q
 § K Q 10 9 6
 |  ª Q J 2 © Q 7 6
 ¨ A K 9 7 6 4
 § 4
 |  | ª A K 10 © A 10 4 2
 ¨ 8
 § A J 7 5 2
 | 
|  | ª 5 4 © K 9 8 3
 ¨ J 10 5 3 2
 § 8 3
 |  
             
               
                | West | North | East | South |   
                | Walsh | Yamada | Haughie | Ohno |   
                |  | Pass | 1§ | Pass |   
                | 1¨ | Pass | 1© | Pass |   
                | 1ª | Pass | 1NT | Pass |   
                | 3NT | All Pass |  |  |  
             
               
                | West | North | East | South |   
                | Nakatani | Lester | Naniwada | Lorentz |   
                |  | Pass | 1§ | Pass |   
                | 1¨ | Pass | 1© | Pass |   
                | 1ª | Pass | 2NT | Pass |   
                | 3NT | All Pass |  |  |  
              Both Easts declared 3NT and both received a low diamond lead on 
              which they played the ace. For Japan, Masaru Naniwada continued 
              with king then nine of diamonds to the ten. Gabi Lorentz switched 
              to a spade but Nanwada was in control, being able to establish the 
              diamonds and get to them when the ©K 
              was onside; ten tricks for +430.
                |  |  |  
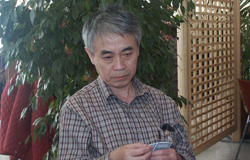
                | Masaru Naniwada, 
                    Japan |  |   Bill Haughie preferred to play on hearts when North showed out 
              on the second diamond and tried leading to the ten at trick two. 
              Kyoko Ohno took the ©K and returned the nine to dummy’s queen. 
              Haughie played dummy’s club and Akihiko Yamada split his honours. 
              Haughie won the §A and cashed the spades then led to the heart ace. 
              Down to three clubs and a losing heart, he exited with a low club 
              and Yamada had to win the nine. He could cash a spade but had kept 
              too many clubs so now had to concede the last trick to declarer’s 
              jack; nine tricks for +400 but 1 IMP to Japan. 
             
              
                | Board 19. Dealer South. E/W 
                    Vul. |  
|  | ª 8 6 5 © A 10 9 8
 ¨ A Q 7 4
 § 10 8
 |  ª A 7 4 2 © Q 7 5 3
 ¨ J 9 5
 § 7 4
 |  | ª J 10 © K 4 2
 ¨ 10 6
 § K J 9 6 3 2
 | 
|  | ª K Q 9 3 © J 6
 ¨ K 8 3 2
 § A Q 5
 |  
             
               
                | West | North | East | South |   
                | Walsh | Yamada | Haughie | Ohno |   
                |  |  |  | 1¨ |   
                | Pass | 1© | Pass | 1NT |   
                | Pass | 3NT | All Pass |  |  
             
               
                | West | North | East | South |   
                | Nakatani | Lester | Naniwada | Lorentz |   
                |  |  |  | 1NT |   
                | All Pass |  |  |  |  Lorentz showed a weak no trump while Yamada’s sequence promised 
              15-17, making the subsequent decisions automatic. After a heart 
              lead and spade switch, Lorentz took both heart and club finesses 
              to come to eleven tricks for +210. Ohno received a spade lead to 
              the ten and king. She ran the jack of hearts to the king and back 
              came the ªJ for queen, ducked. A heart to the nine won and now Ohno 
              gave up a spade. She did not take the club finesse so held herself 
              to ten tricks for +430 and 6 IMPs to Japan. 
             
              
                | Board 21. Dealer North. N/S 
                    Vul. |  
|  | ª 6 5 © Q 7 6 3
 ¨ K 10 6 5 4
 § 6 5
 |  ª 10 8 7 3 2 © J
 ¨ 9
 § J 9 7 4 3 2
 |  | ª K Q 9 4 © 9 8 4 2
 ¨ 7
 § A K Q 8
 | 
|  | ª A J © A K 10 5
 ¨ A Q J 8 3 2
 § 10
 |  
             
               
                | West | North | East | South |   
                | Walsh | Yamada | Haughie | Ohno |   
                |  | Pass | 1§ | Dble |   
                | 4§ | Pass | 5§ | 5¨ |   
                | All Pass |  |  |  |  
             
               
                | West | North | East | South |   
                | Nakatani | Lester | Naniwada | Lorentz |   
                |  | Pass | 1§ | Dble |   
                | 3§ | Pass | Pass | 3¨ |   
                | 3ª | 5¨ | 5ª | Dble |   
                | All Pass |  |  |  |  How should you handle the West cards after South’s take-out 
              double? The two Wests were actually in quite different situations 
              because Haughie had virtually guaranteed four clubs while Naniwada 
              might have had only two.  Alan Walsh jumped to 4§ and Haughie raised himself to game, leaving 
              Ohno with no option but to bid 5¨. With his right-hand-opponent 
              having been forced to bid under pressure, Walsh could not justify 
              bidding again, despite his extra distribution. He led the jack of 
              hearts but there was nothing to the hand; +600.  Tadayoshi Nakatani could not afford to jump quite so aggressively 
              at his first turn and contented himself with a raise to 3§, however, 
              that worked very well a sit allowed him to show the spades at his 
              next turn and now it was an easy matter for Naniwada to go on to 
              5ª over 5¨. Five Spades doubled was down only one for –100 
              but 11 IMPs to Japan.My own preference, for what it is worth, would be to bid 4§ facing 
              a four-card club opener but with the intention of then bidding 4ª 
              over four of a red suit. Nakatani’s sequence looks just fine 
              opposite potentially short clubs.


                | Board 22. Dealer East. E/W 
                    Vul. |  
|  | ª 10 9 8 4 3 © 9 4
 ¨ 7 2
 § K Q J 8
 |  ª K © A Q J 8
 ¨ Q 10 4 3
 § 10 9 6 4
 |  | ª A 7 6 © 7 6
 ¨ K J 9 8 6 5
 § 5 3
 | 
|  | ª Q J 5 2 © K 10 5 3 2
 ¨ A
 § A 7 2
 |  
             
               
                | West | North | East | South |   
                | Walsh | Yamada | Haughie | Ohno |   
                |  |  | Pass | 1© |   
                | Pass | 1ª | Pass | 2ª |   
                | All Pass |  |  |  |  
             
               
                | West | North | East | South |   
                | Nakatani | Lester | Naniwada | Lorentz |   
                |  |  | Pass | 1© |   
                | Pass | 1ª | Pass | 3¨ |   
                | Pass | 3© | Pass | 3ª |   
                | Pass | 4ª | All Pass |  |  Ohno contented herself with a simple raise of the 1ª response, 
              downgrading the singleton ace slightly. East/West do very well in 
              a diamond contract, but the vulnerability dissuaded Haughie from 
              protecting. He passed out 2ª and led a club. Yamada won dummy’s 
              ace and played the ªQ to the bare king and back came a second club. 
              Yamada won and played another spade. Haughie won the ace and switched 
              to a heart so the defence got its heart tricks and a club ruff; 
              just made for +110.  Lorentz could show an invitational spade raise with a singleton 
              diamond so did so – a slight stretch, perhaps, but the ability 
              to describe the distribution perhaps justifies that. John Lester 
              went on to game and this time the lead was a low trump followed 
              by a club switch. The defence was a tempo behind now so the club 
              ruff was lost, but there were still four major-suit losers; down 
              one for –50 and 4 IMPs to Japan. 
             
              
                | Board 25. Dealer North. E/W 
                    Vul. |  
|  | ª J 7 © Q 7 6
 ¨ K 8 5
 § A Q J 9 2
 |  ª A 10 3 © A J 10
 ¨ 10 7
 § K 10 6 5 3
 |  | ª K Q 8 6 4 2 © K
 ¨ A Q J 4 3
 § 7
 | 
|  | ª 9 5 © 9 8 5 4 3 2
 ¨ 9 6 2
 § 8 4
 |  
             
               
                | West | North | East | South |   
                | Walsh | Yamada | Haughie | Ohno |   
                |  | 1NT | 2NT | Pass |   
                | 4© | Pass | 4ª | All Pass |  
             
               
                | West | North | East | South |   
                | Nakatani | Lester | Naniwada | Lorentz |   
                |  | 1NT | 2ª | Pass |   
                | 4ª | All Pass |  |  |  Both Norths opened with a weak no trump but the respective Easts 
              chose very different approaches to showing their potentially very 
              powerful hand. Naniwada made a simple overcall in spades while Haughie 
              preferred to show any strong two-suite. The first approach found 
              an easy raise to game from Nakatani while Walsh had to find a sensible 
              response in an undiscussed sequence. His 4© bid was intended and 
              taken as pass or correct so 4ª was again the final contract.  Ohno led a spade while Lorentz chose a club, so +710 for Haughie 
              and +680 for Naniwada; 1 IMP to Australia. 
             
              
                | Board 26. Dealer East. All 
                    Vul. |  
|  | ª Q 4 © K Q 10 7 6
 ¨ Q 7 5
 § A Q 3
 |  ª 8 7 3 © A
 ¨ 9 6 4 2
 § K J 10 7 2
 |  | ª A K J 9 6 5 2 © 4 2
 ¨ J 10
 § 6 4
 | 
|  | ª 10 © J 9 8 5 3
 ¨ A K 8 3
 § 9 8 5
 |  
             
               
                | West | North | East | South |   
                | Walsh | Yamada | Haughie | Ohno |   
                | Nakatani | Lester | Naniwada | Lorentz |   
                |  |  | 3ª | Pass |   
                | 4ª | All Pass |  |  |  There is one slim chance for declarer in 4ª, given that the clubs 
              are both offside, namely that the ¨9 will become established for 
              a club discard. Both Souths led the ace and king of diamonds then 
              switched to the five of clubs for the jack and queen. Lester duly 
              cashed the ace of clubs now for down one; -100. Yamada tried to 
              cash the ¨Q instead and that was ten tricks for +620 and 12 IMPs 
              to Australia. Haughie followed with the §4, so with Ohno’s 
              switch being systemically third or fifth, there should have been 
              no possibility of confusion, unless I misread the Japanese convention 
              card.  Despite this mishap, Japan led 25-18 at half-time. The second 
              half saw Australia come through to win by 48-33IMPs, 18-12VPs. |